Post Overview:
This post details the fitting of the monitor into the main table.Introduction:
This post details the method used to fit the monitor into the main table. In the prev building step the main table was assembled, but the monitor wasn't fitted (as it hadn't been purchased). Details of the power & display connections and wiring will be covered in coming posts.Links to the full photo set for this build stage are also provided, but they contain no context information and thus are best reviewed after reading the blog entry.
The blog entry closes with post-build thoughts and where possible, suggested 'next time' improvement ideas.
Main Table - Construction:
Overview/Background: The overall plan is to cut a hole in the top of the table, place the monitor in said hole and figure out how to hold the monitor in place...... let's see how it goes. |
| Monitor with stand fitted |
Firstly the monitor stand will need removing.

Three small screws hold the monitor stand in place; these are removed.
 |
| Monitor stand removed |
That's better, the stand has been removed.
 The monitor bezel won't be needed, nor will the plastic monitor back.
 The hole for the monitor will be cut to exactly the same size as the screen (we hope). The plastic back is only needed for styling and keeping the innards enclosed - as the monitor will be inside the table, the back isn't needed and will be removed.
As can be seen there are some controls on the bezel, but in fact, this is just cover over the real buttons.

These are the real buttons that were behind the bezel. They will be relocated within the main table.

Back and bezel removed, ready for fitting.

The bezel has been centered on top of table three, the top layer. The shaded section will be removed and is where the monitor will be fitted on the under side.

The first cut isn't the deepest, as the jigsaw is held up to stop it cutting thru the low part of the table.
 So that the jigsaw doesn' cut too far, small guide holes were first drilled at the corners of the piece to be removed. The idea being that the blade would find the hole without over cutting..... relieved surprise, it worked perfectly!
The monitor screen section is removed.....

The edge-thickness of the hole (and table top) need spraying painting, as the contrasting colour of the light wood against the black of the table top is unsightly, and will also be distracting during game play...... to the spray booth.
 |
| wooden block fix |
This 'version one' block (i.e. just an off-cut of wood) is jammed in between the monitor and the bottom of table 3 (the top layer of the complete table). The photo also shows table 2, the middle layer, which is used for space and height.
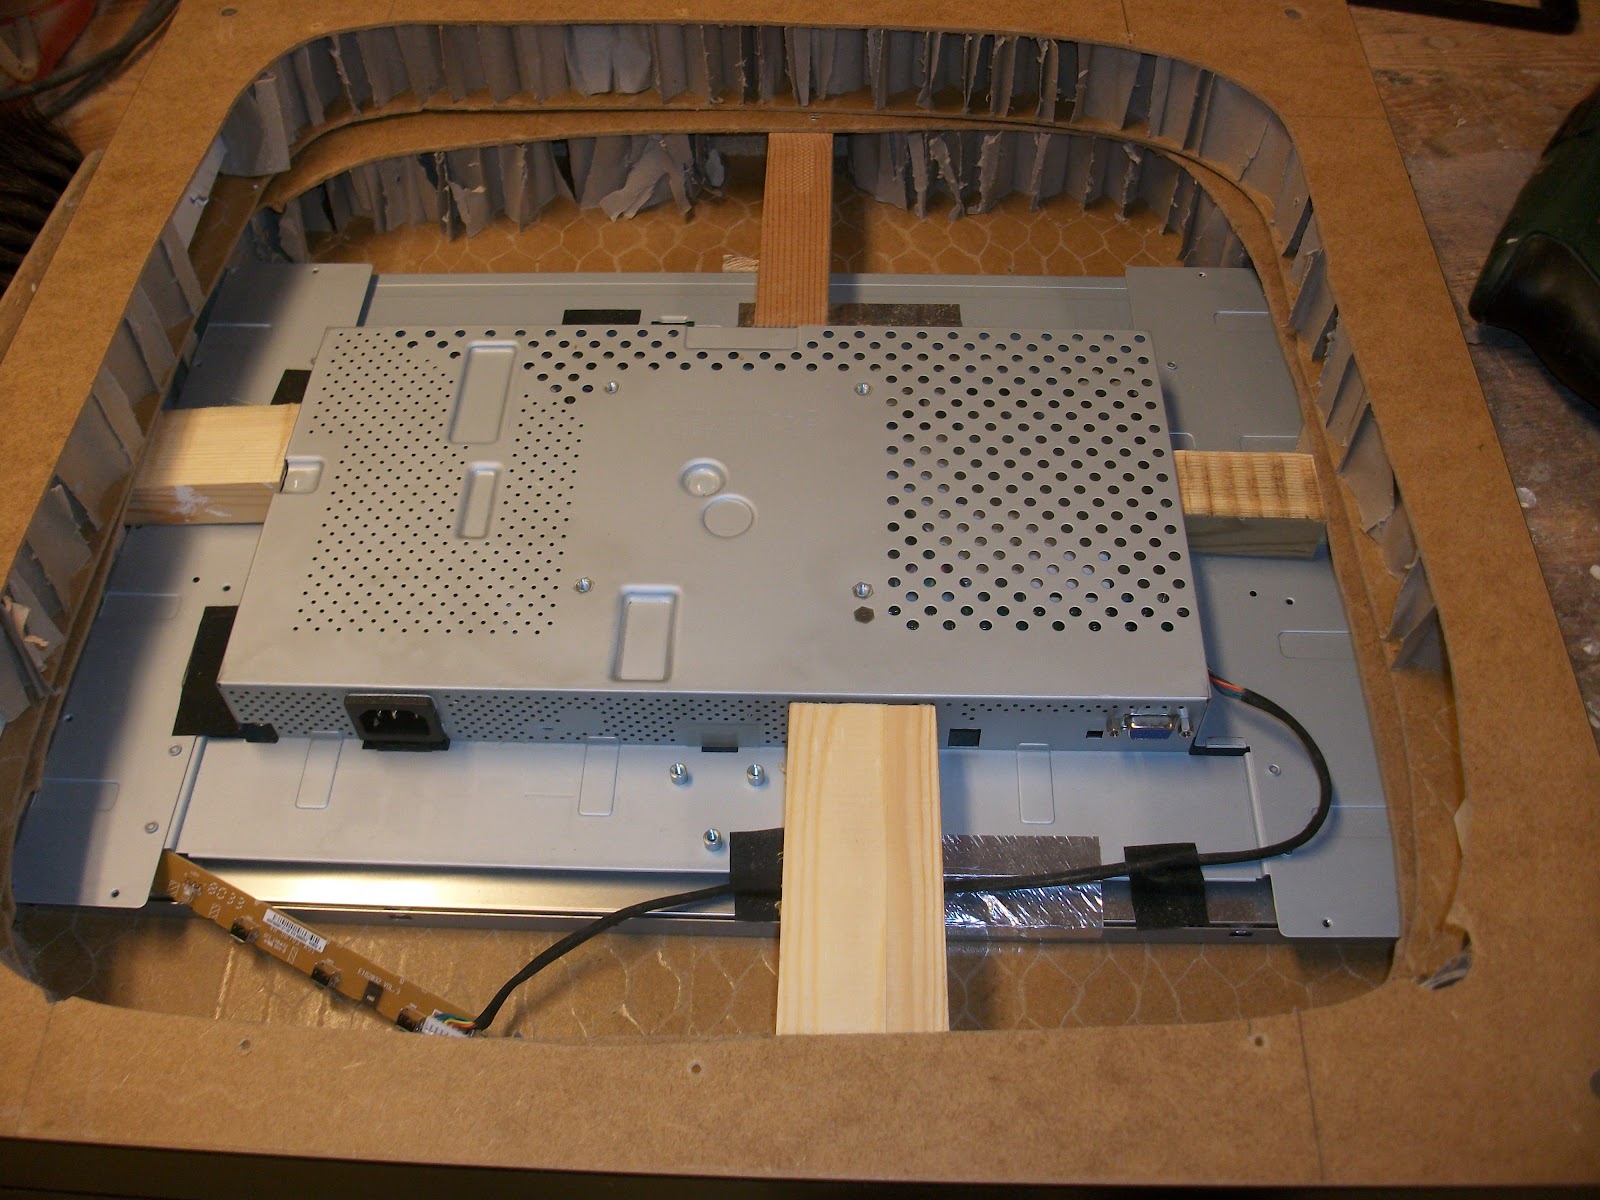
The complete set of holding pieces doing their job - holding the monitor in place. The pieces were shaped to fit the monitor and designed to lock into place.
 "A" then "B" were fitted to form the core frame for holding the monitor. Next "C", with its almost rounded-end (to allow for fitting) was slotted into place.
 Following that "D" was tapped into place. "D" is actually two pieces. One part was screwed into the frame (under the lip of the table edge) and the other part is the visable area of "D". The visable part of "D" is removable so that it can be fitted whilst the rest of the (now solid) parts are in place. Even though the pieces alone held the monitor tightly in place, they were screwed in for added strength.
Finally, the circled area in the photo is were a small wedge was tapped into place for an even better fit.

This is a close-up the pieces prior to fitting.
 |
| Table 2 (middle layer) on top of table 3 (top layer). |
This photo gives a sense of how much space is created by the addition of layer 2, the middle layer, of the table. This is going to be needed for the jamma unit, power and other internal items.
 |
| Nice Result |
The table top with the monitor in place; just needs the glass top putting in place......
 |
| Happy ending |
....... with the glass top in place.
This concludes this build section.
Stage Review/'Next Time' Thoughts:
 |
| Recap photo. |
Frankly, prior to starting the build I had no idea how the monitor was going to be fitted into the table. The block idea came about by simply having a need to flip the table over for inspection and thus needing to hold the monitor in place with 'something'.
Without the existing table frame and specifically the lower edge of the table bottom, the wedge idea wouldn't have worked (too well), as there would have been very limted options for securing the holding pieces in place.
Also the monitor hole is good result. Controlling the jigsaw while it's held flat simply requires a steady hand - the blade can only go where it's directed. However, the jigsaw isn't really designed to be held at 45 degrees and thus the blade is prone to drift off course. Getting a straight edge was more a matter of luck than any form of skill.... either way, a good result.
The thickness of the monitor would have allowed it to fit inside just one table, but it's becoming clear that layer 2 (the middle layer) is going to be need to allow the required room for all the internal items.
 |
| 54cm x 54cm |
Links to photo set:
Similar to build stage 3 and stage 4, the photo set for this stage contains more pictures than those in the above blog post.=
=